Concrete Carvings
Houdini RBD Simulation
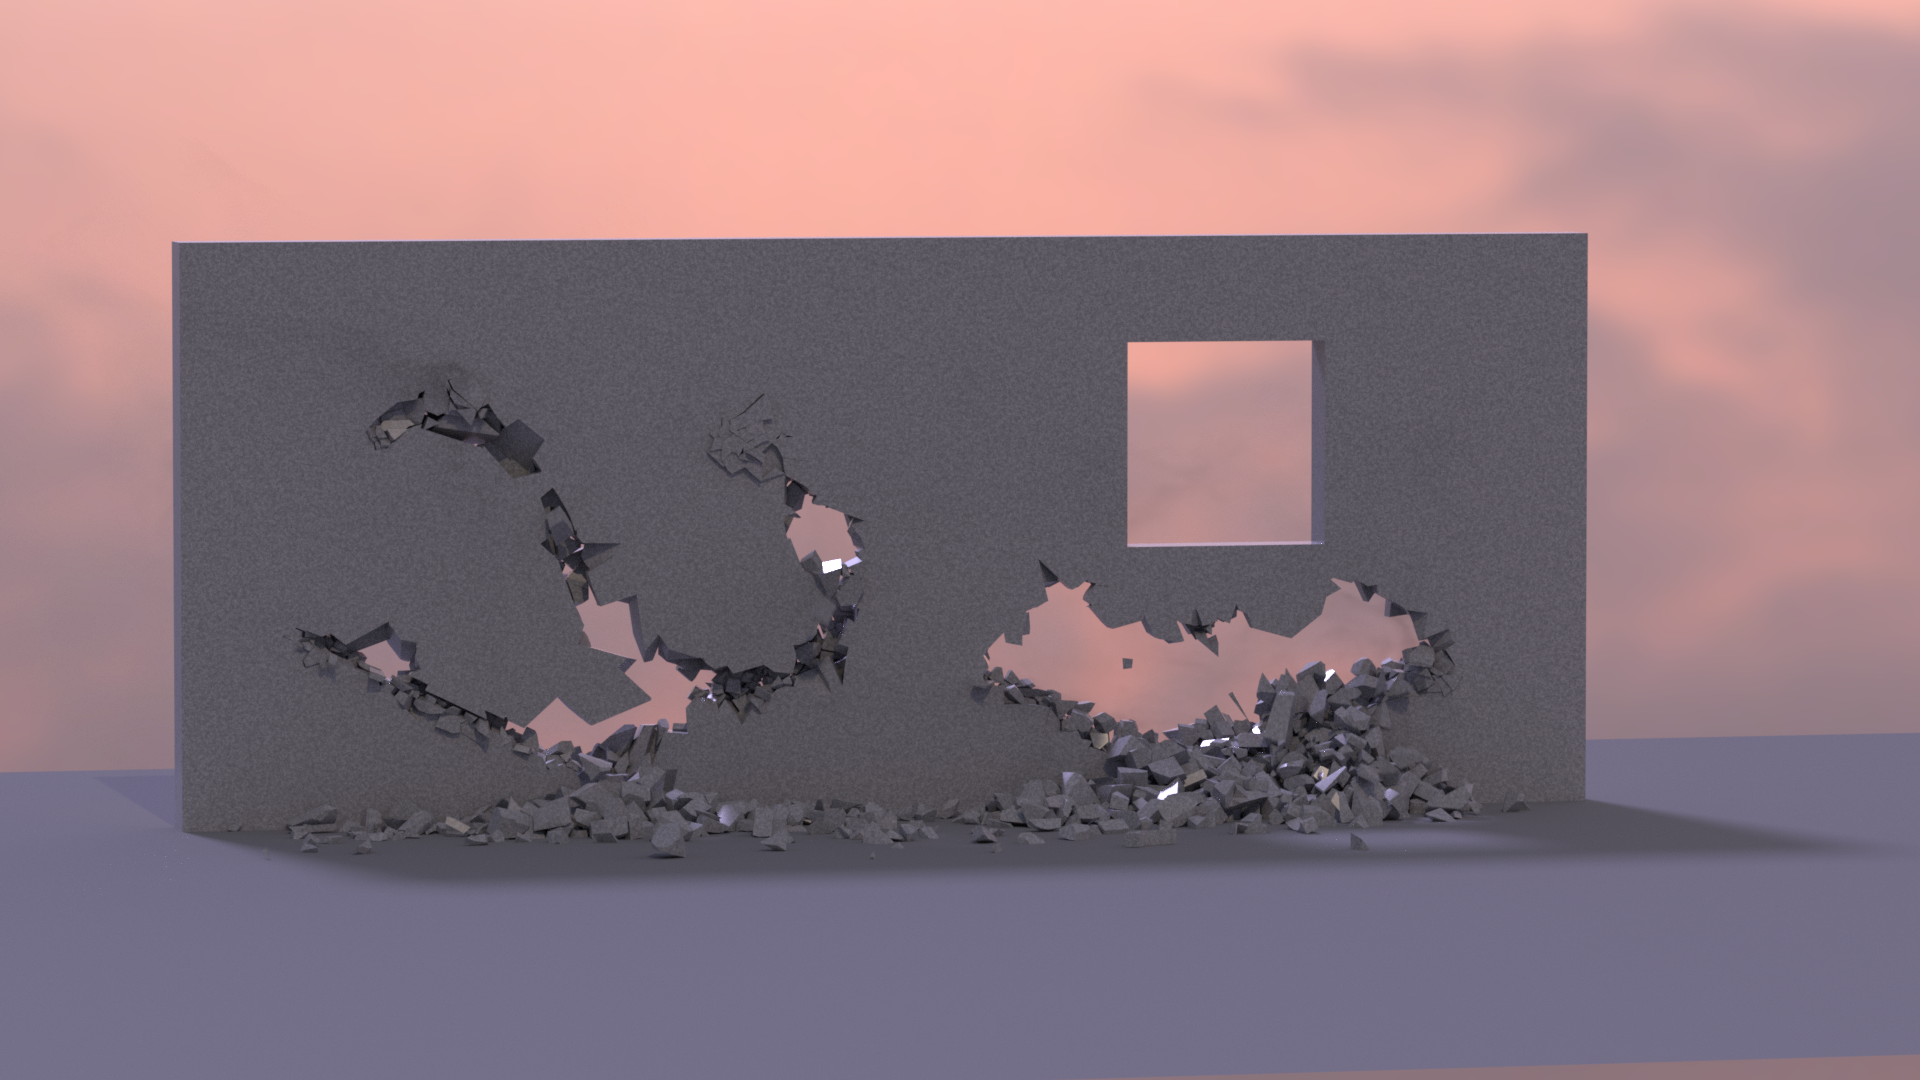
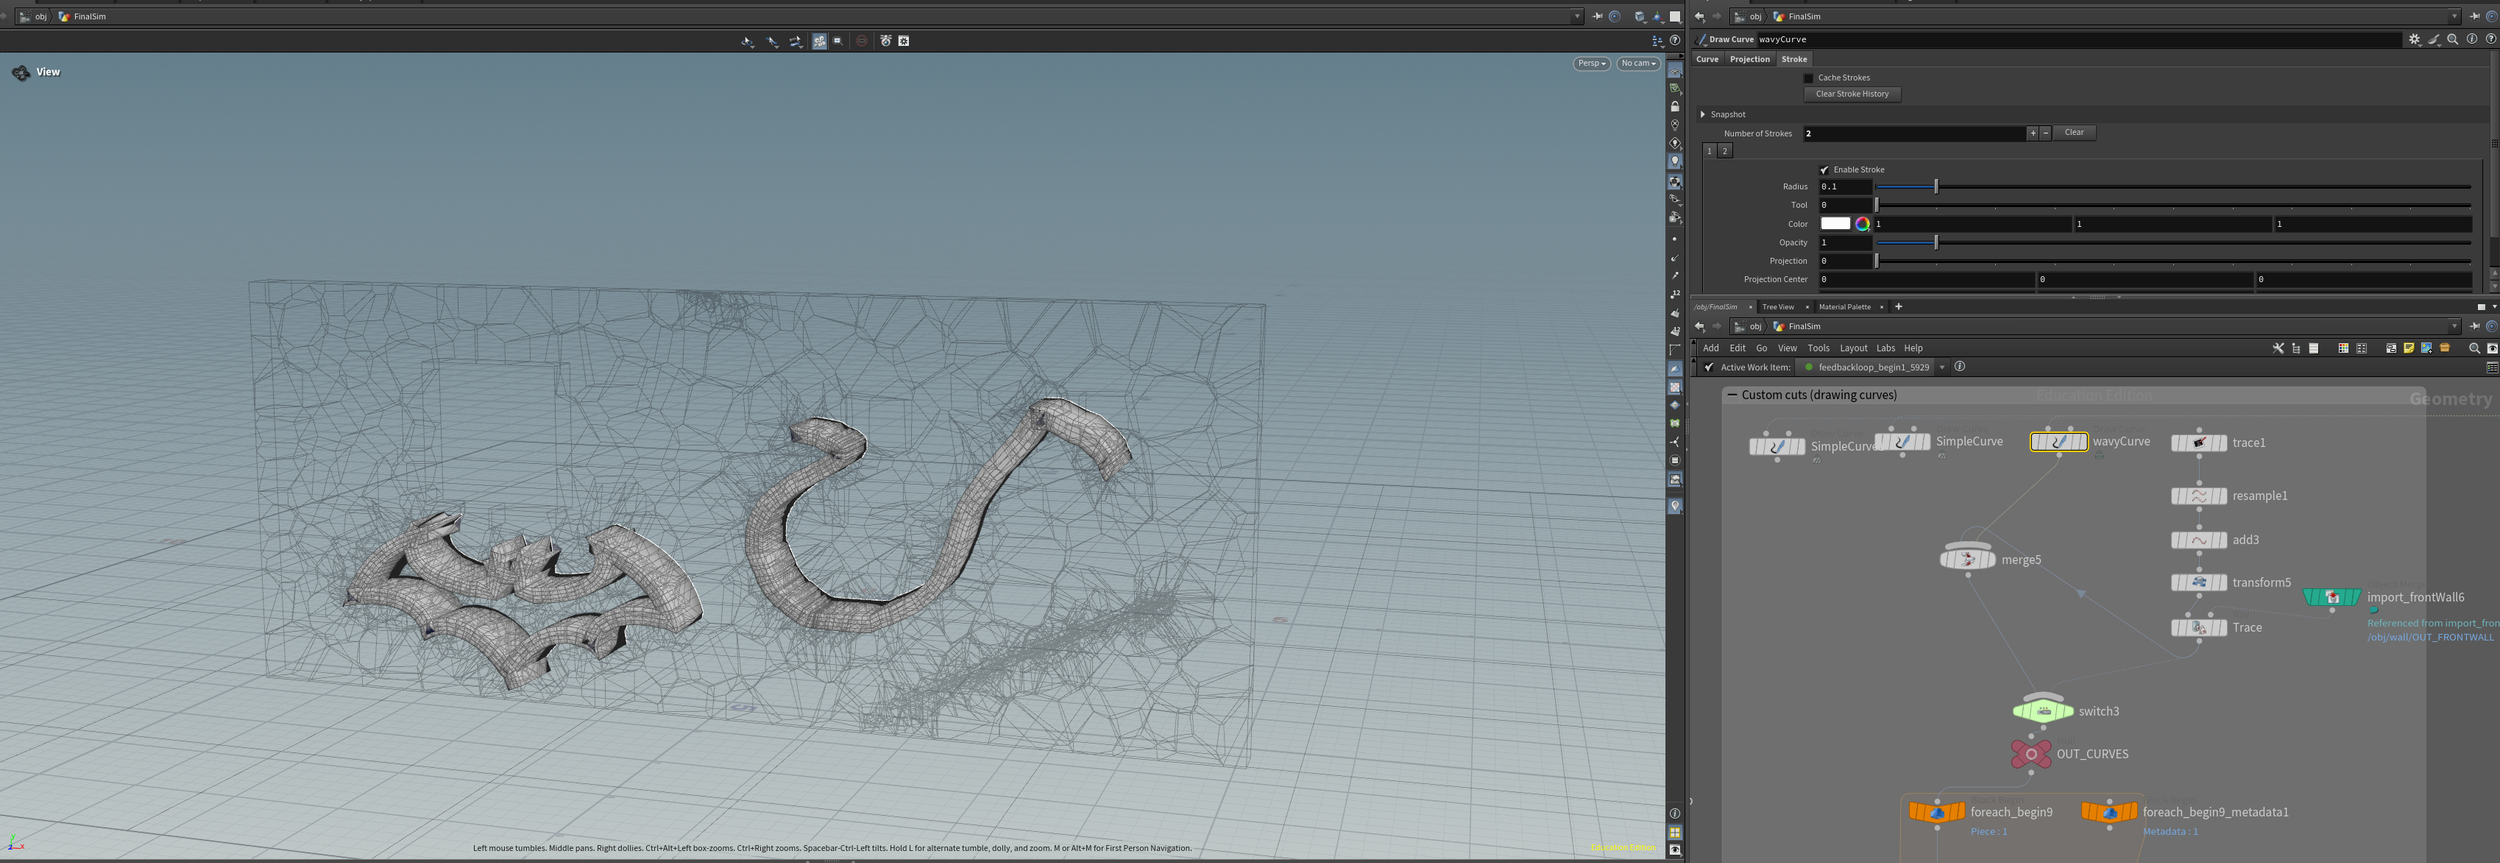
This semester long project was inspired by some concrete cutting effects I’ve seen in older movies like kung fu hustle. At first, I didn’t realize how hard it could end up being. Most tutorials online only had large scale fractures, or nothing that needed a precise look. But I was going for something that looked more like carvings. I showcase three different ways of carving the wall, the straight line is done with a sword Geo, the curve with a freehand drawn curve, and the bat symbol, a PNG I imported and converted with the trace node.
Prefracture
For the fracture, I knew that I had to make the pieces small and detailed enough to actually look like cuts and not just chunks coming off the wall, but I didn’t want to make the sim overly intensive by fracturing it into too many pieces. I tested out a few methods, but I eventually settled on doing multiple rounds of fracture. The first round just shattered it into smaller pieces, nothing fancy.
For the second round, I wanted to get the shape of the cut. By extruding the curves and cutting geo, I had it intersected with the wall and used a Boolean fracture to get the shape of the cut.
At first, I was getting issues with the rest of my fractured geometry messing up. I had trouble with Boolean in general before, where it would mess up my geometry.
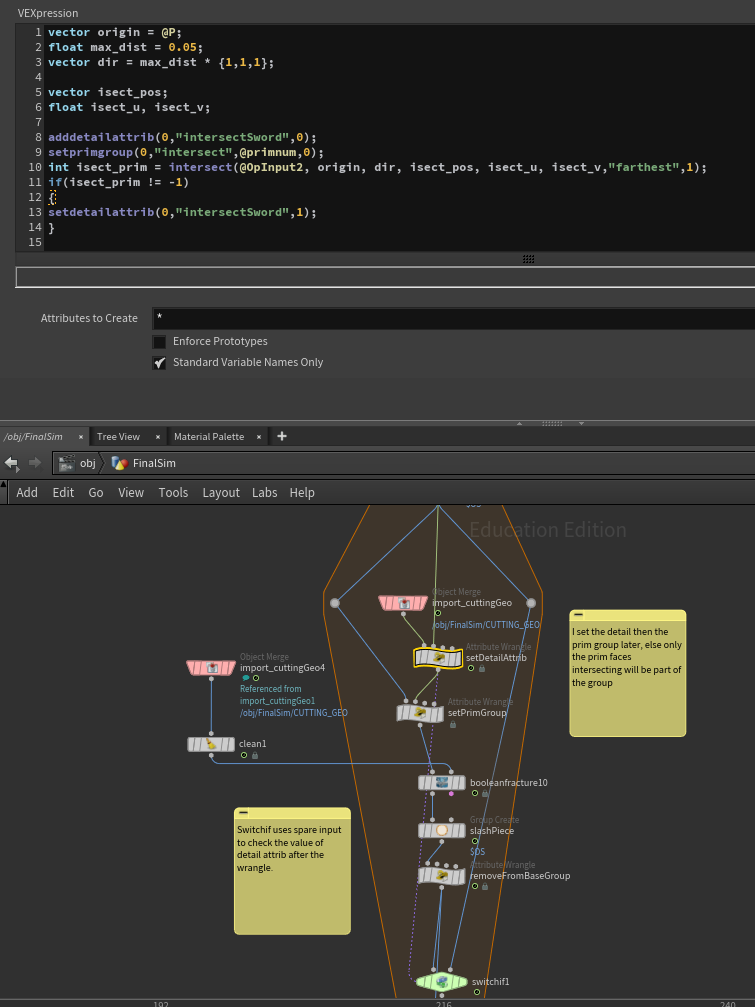
I tried different settings on the node itself, but nothing seemed to fix it. In the end I realized that the areas that were messed up were the areas where there wasn’t supposed to be any fractures. To get around this, I used vex to check for intersection between each piece and the cutting geo. Only those that are intersecting will be Boolean fractured, and the switchif node checks for the existence of a detail attrib I set.
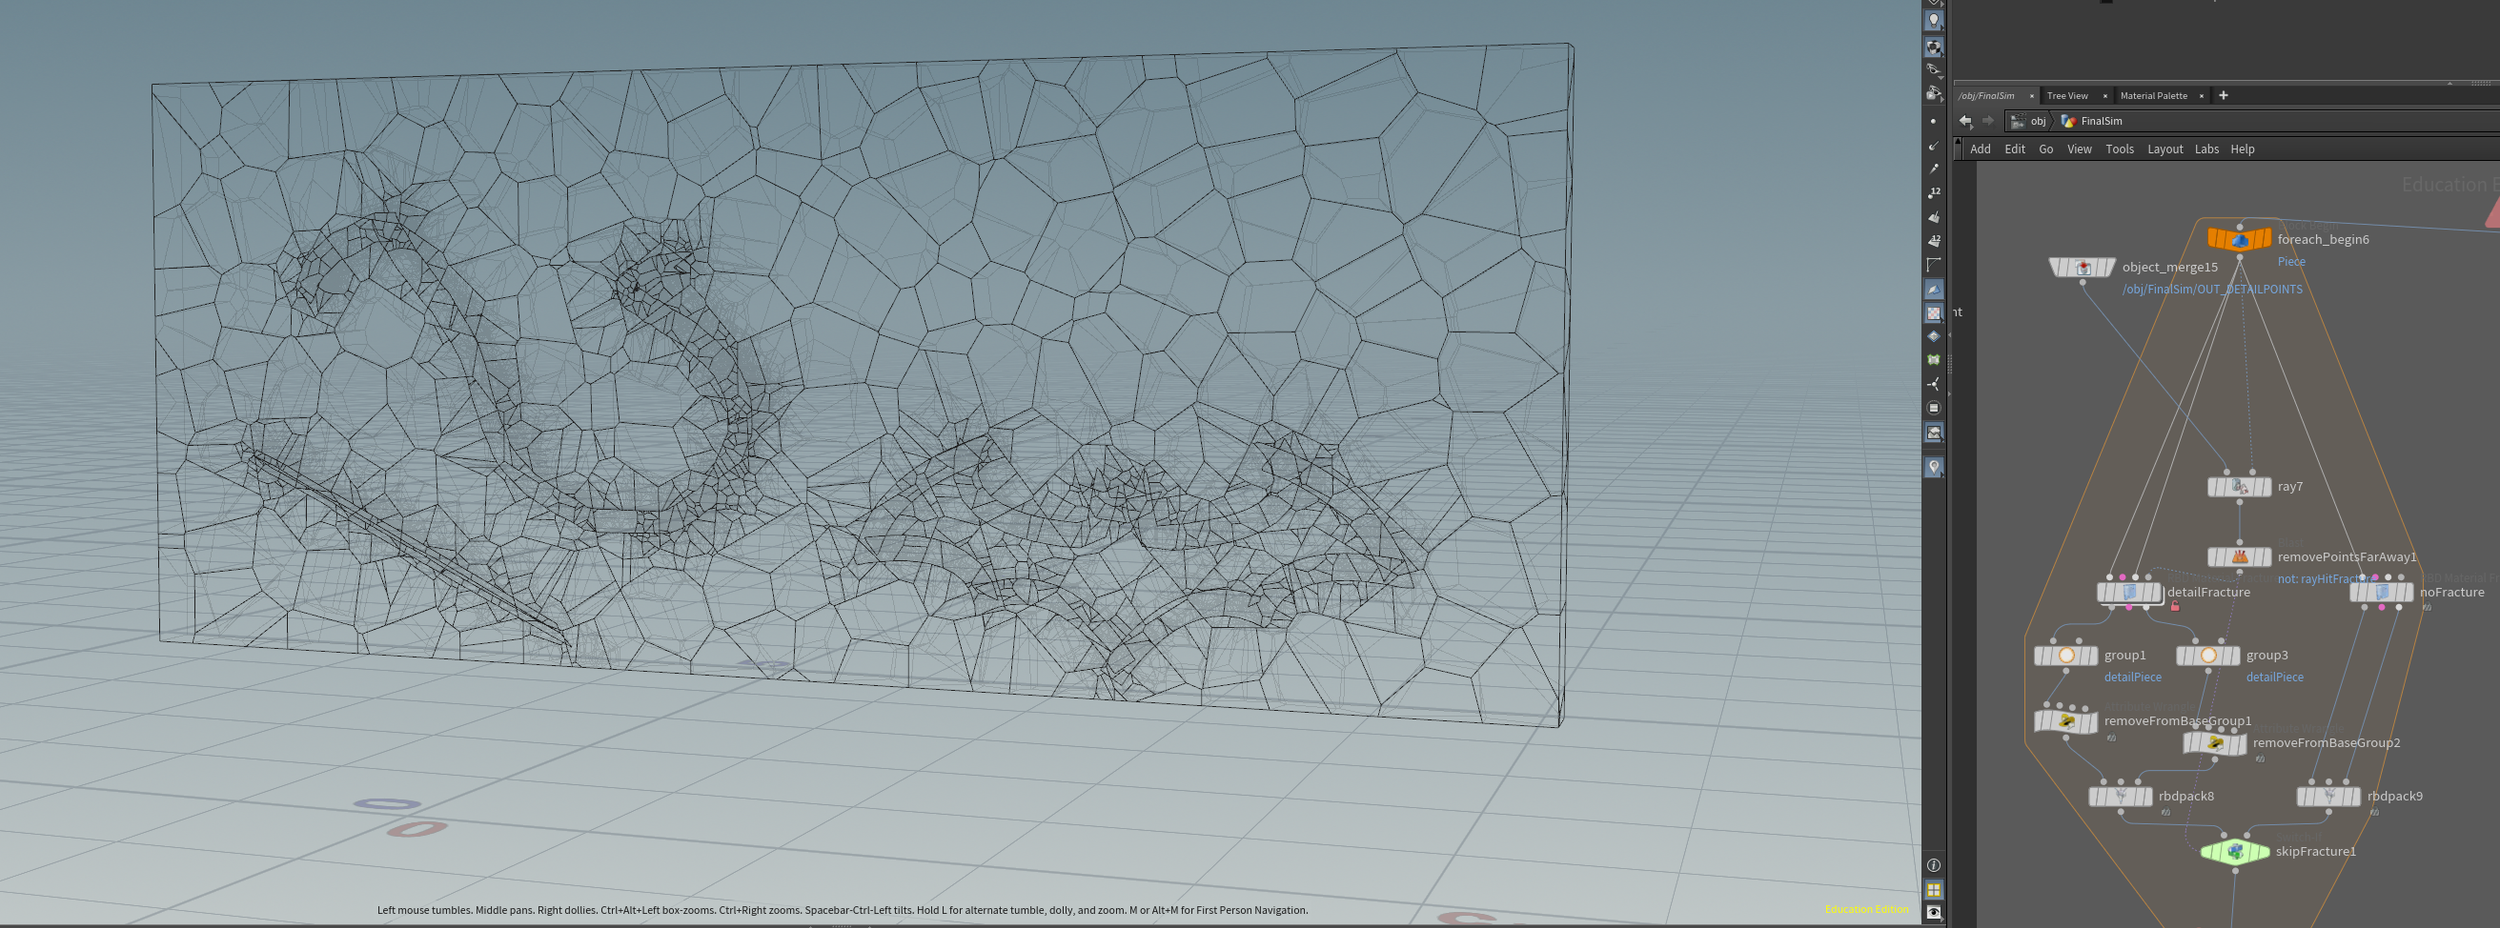
For the final round, in order to avoid the cut chunks coming out as 1 big piece, I used the previous cutting geometry and generated points, jittering them before passing them into the rbd fracture, this served as my detailed pieces, and it helps chip nicely.
I encountered a different issue, when I tried using constraint from rules, where pieces that are far away from the points I was using were still considered “detailed pieces”. It took me quite a bit to figure out what was going on, and I was led astray by a really old ODforce post where they mentioned that points outside of the geo to be fractured will be ignored.
I did some testing, and it turns out that, instead of being ignored, Houdini tries to snap the points to the edge of the geo, so it was fracturing even pieces it wasn’t supposed to. I used a different test this time, raycasting to check if the points are in the pieces and branching out if they aren’t. With this fracture I passed even the pieces that weren’t going to be fractured through a rbd fracture node anyway, in order to have both the proxy and actual geo pieces.
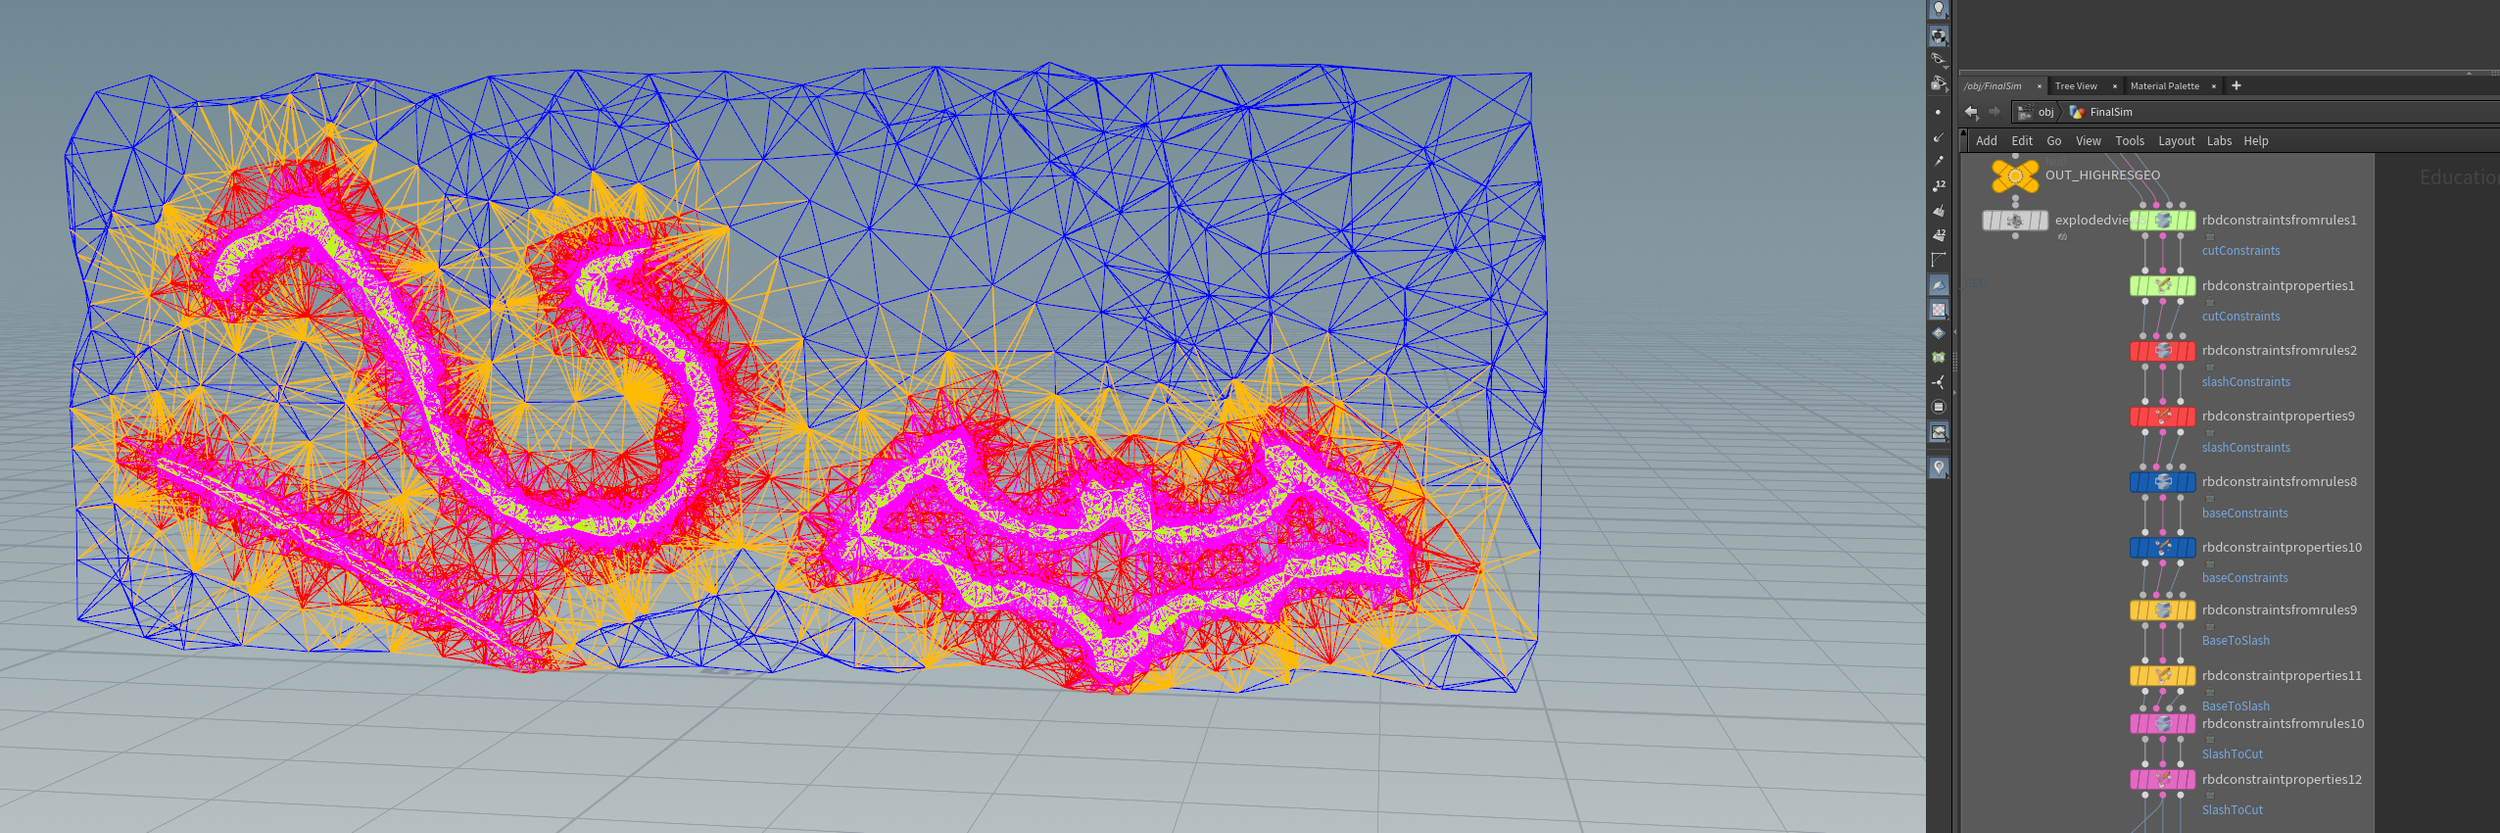
By splitting the fracture into multiple rounds, it also helped me set up different sets of constraints, I wanted the carving to come out first, followed by some of the pieces around it, so the carving is obvious. I had 4 sets of constraints, bound together using the constraints from rules node.
TOPS experiment
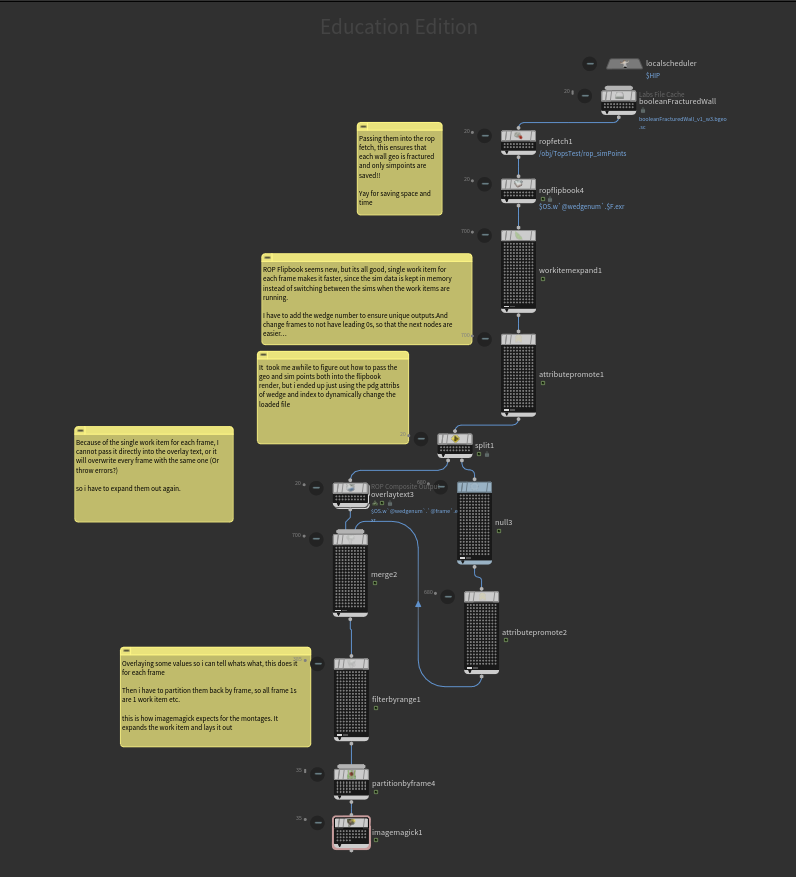
Since I had so many different possible configurations of the size for the cutting geometry, the number of points to generate, the strength of constraints and the force strength, it would have been too time-consuming to run through the sims one by one. I used a TOP network, with the labs file cache node to wedge my fractured geometry, to generate 100s of variations of my wall and cutting geo. It then runs through a ROP flipbook, to render out the simulation and then outputs it as a set of montages. This way I could easily see what set of numbers look better than others, and I could let the TOP network run while I take a break.
A few tutorials I’ve seen online show the workflow for using rop fetches to cache dop sims with TOPS. But a big issue with my setup is the size of those caches, especially with the number of wedges I’m doing. I had to do some trial and error, but I eventually managed to get my setup to cache only the sim points and have the rop flipbook generate from the correct set of points and geometry by referencing the pdg work item attributes in my file loads.
simulating
I tried using sword geometry to hit a prefractured wall, but because of the way impacts and the collisions work, the impact could never look like a sword slash. After trying, I realized that it’s too finnicky to work with. Having to break the glue constraints with the swords meant that I had to use insane mass and velocity, and it just didn’t feel easy to control. so, I resorted to using forces instead.
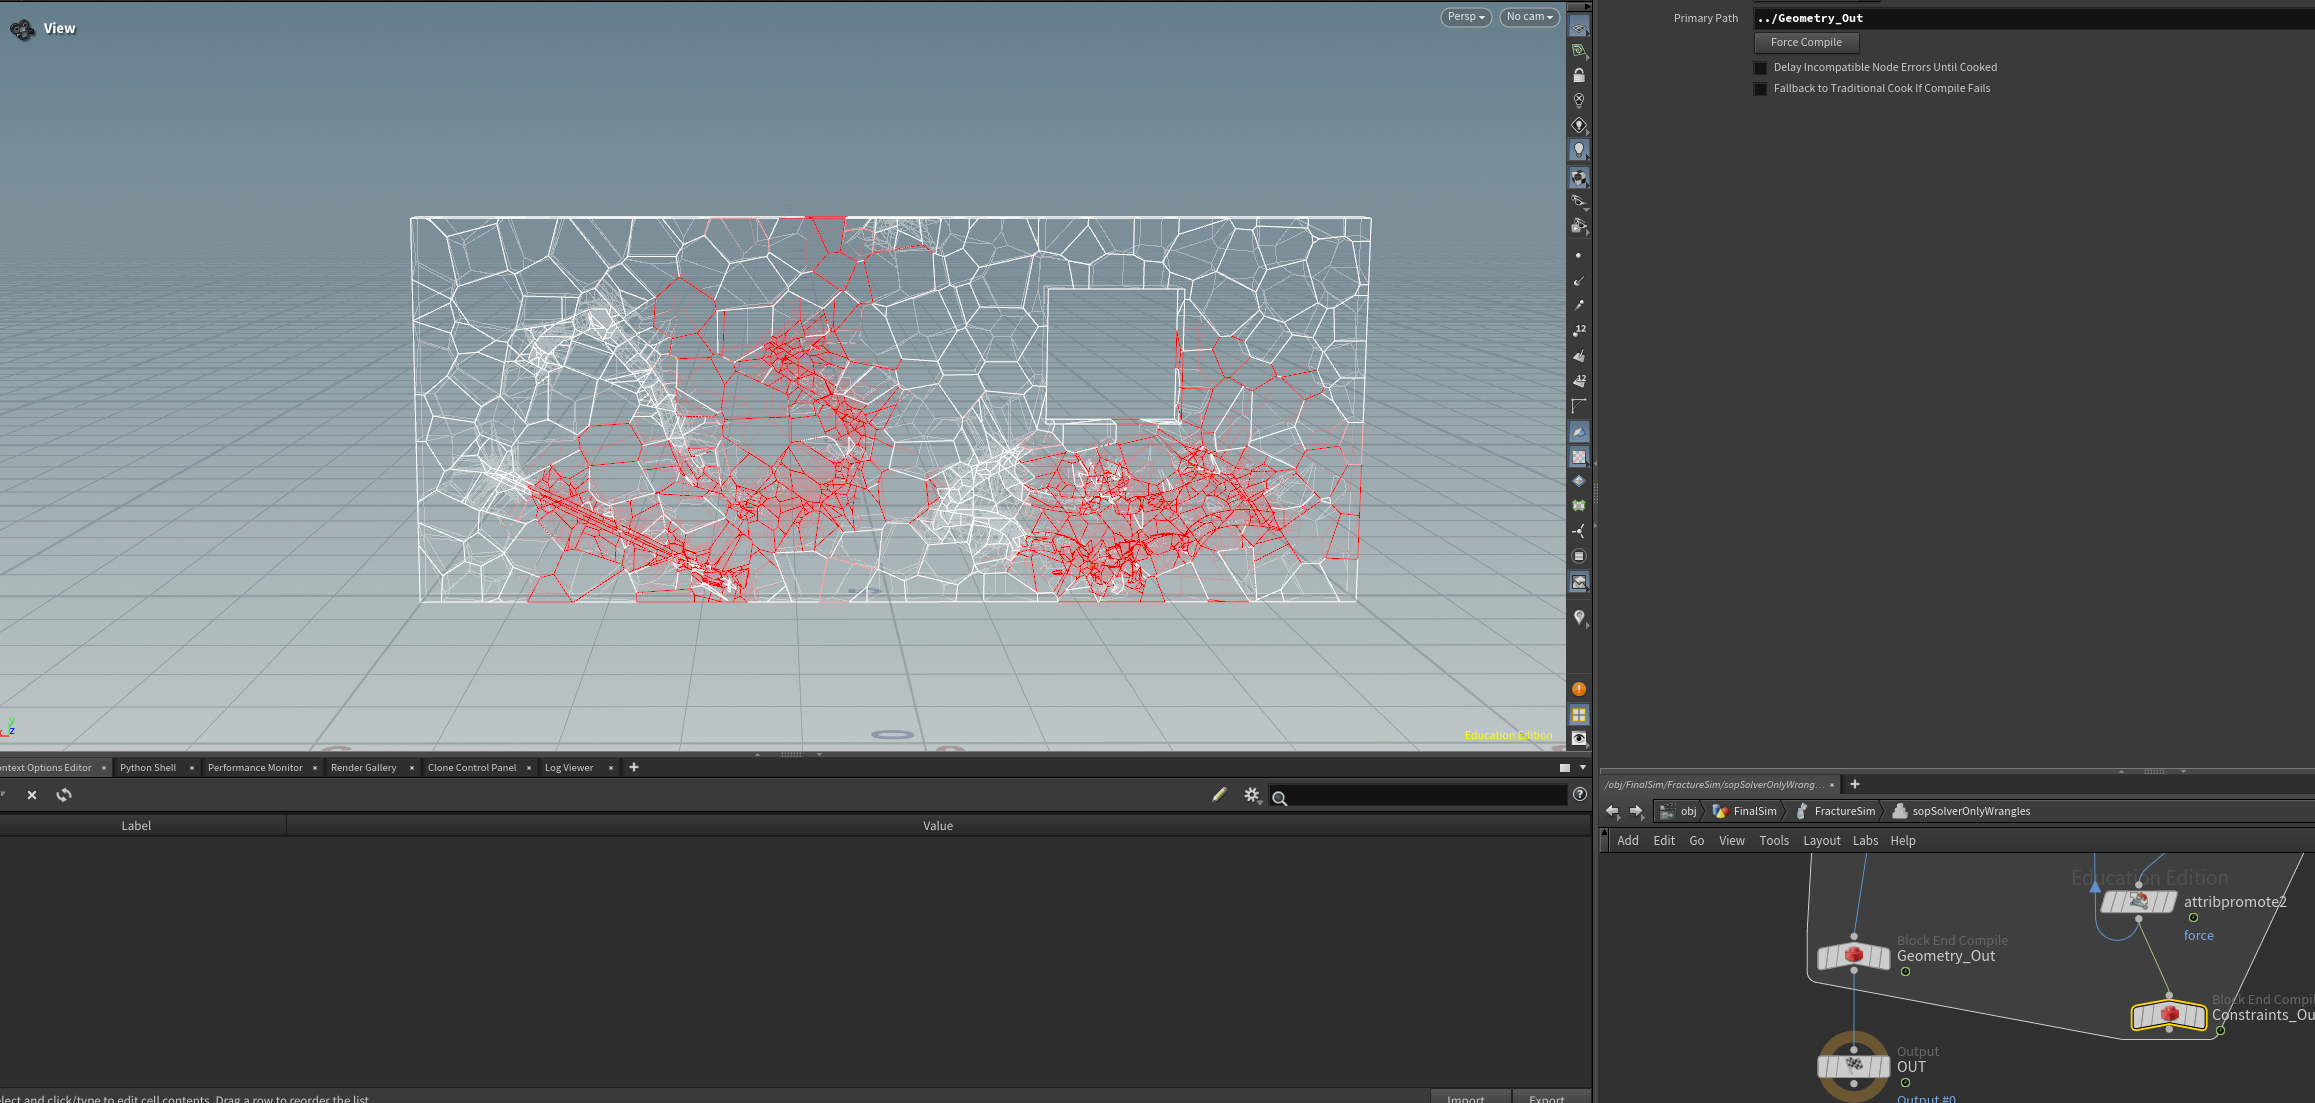
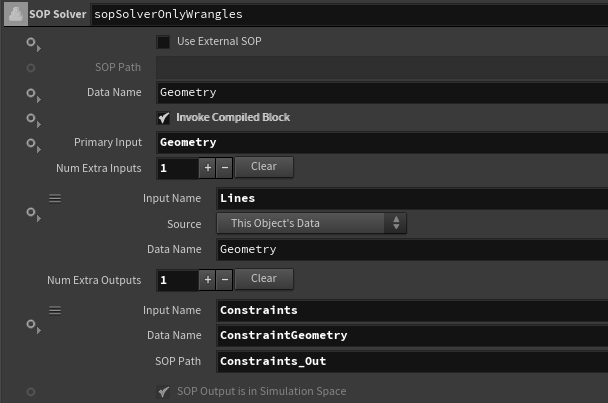
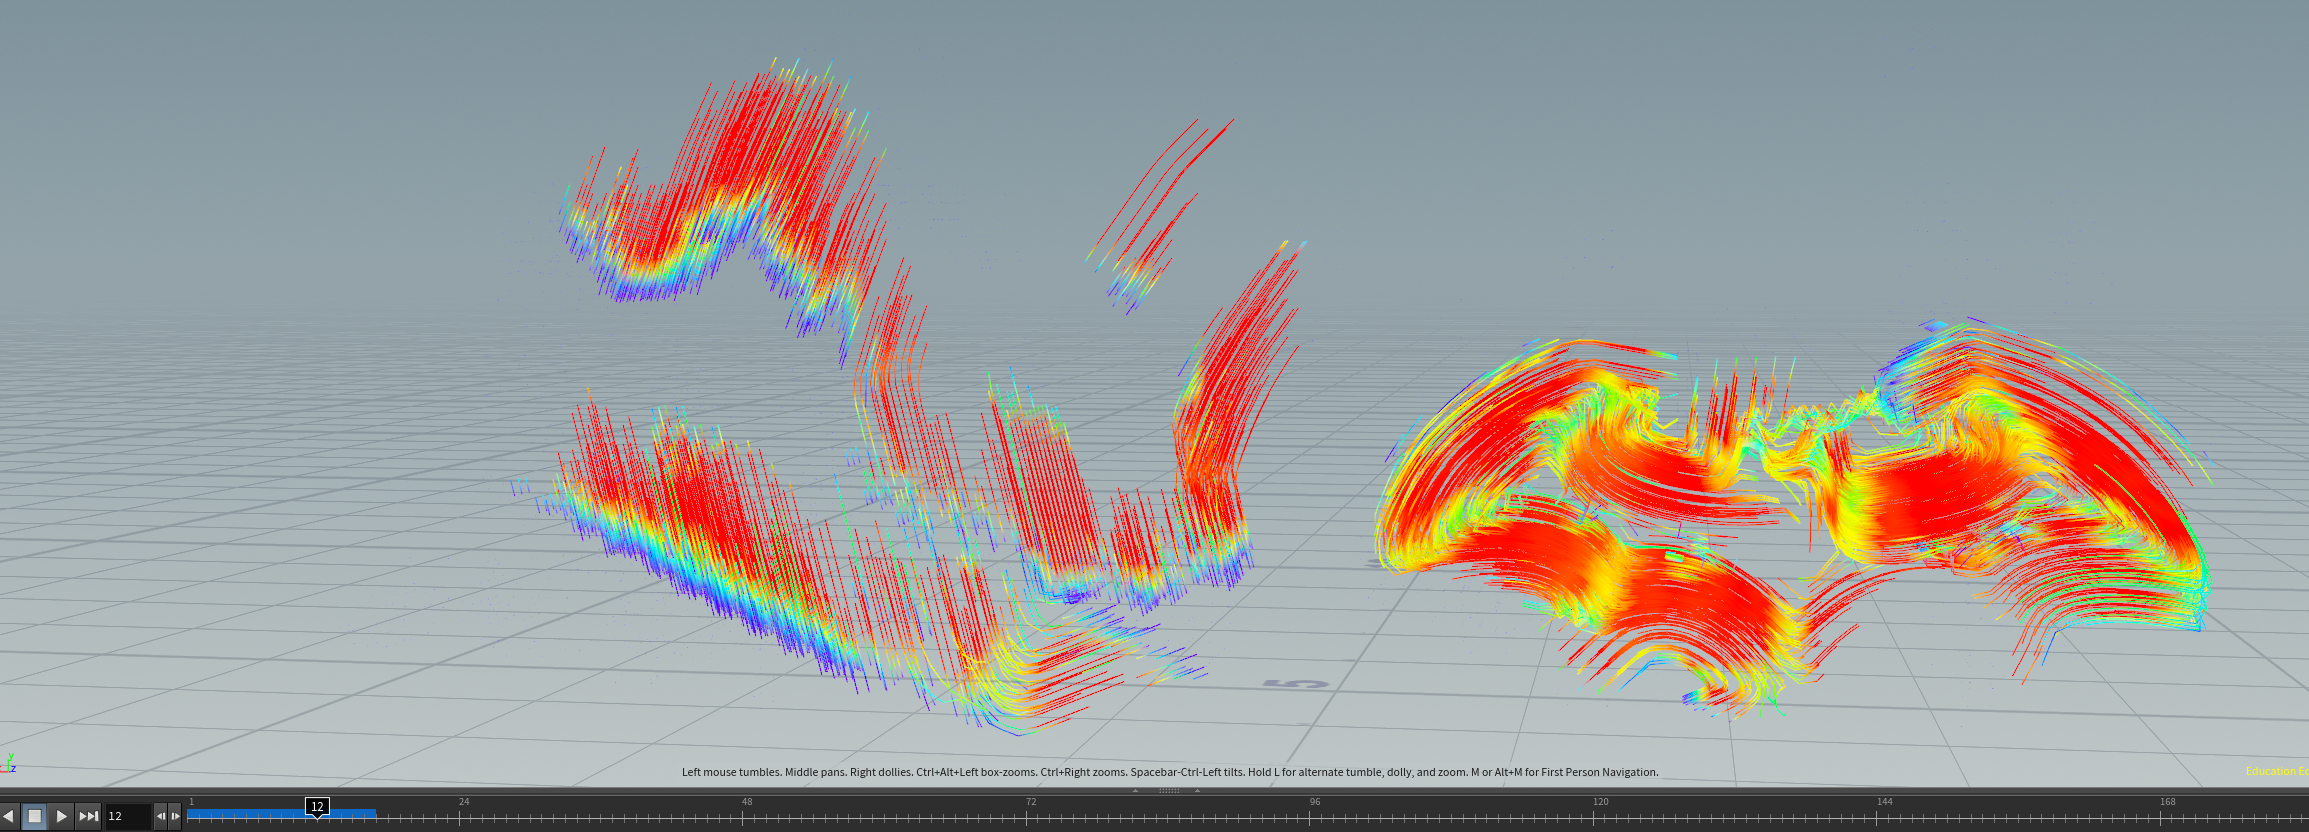
Glue constraints don’t work with forces, so I used a sop solver. I used animated lines on where the cuts should be and transferred the forces to nearby pieces in the sop solver. I was trying the workflow of attaching internal constraints to objects, so I don’t have to match the constraints to the pieces. I had some issues trying to get the lines with forces into my solver, it took some trial and error to figure out what parameters I had to use. I used an attribute transfer to pass the force value from the lines to nearby pieces, and weakened the strength of the constraints.
Secondary Sims
After all the work, the rest of it was pretty straightforward. I had some issues applying velocity to some pieces only on the frame that they are broken from their constraints, so instead I used debris sourcing to generate small rocks to fake that. For the smoke I used the upscaling example from the shelf tool. Instead of having just the velocity from a low-res sim, I also used the same lines I use for forces, to drive velocity in the directions of the cuts.
Rendering is where I’m the most unfamiliar with, and only after submitting my renders did, I realize that there’s a different way of importing rbd geometry into LOPs, which seems to be more performant, that’s one thing that I will try next.
My overall experience
I had alot of fun in this project, even though I encountered so many issues that took days to figure out. I think although my final render turned out less polished than I wanted it to be, I gained a lot of in depth knowledge on fracturing and sop solvers.